| |
CURIOUS FACTS - Espresso

|
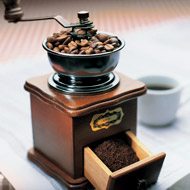
Espresso, a recent innovation in the way to prepare coffee, obtained its origin in 1822, with the innovation of the first crude espresso machine in France. The Italians perfected this wonderful machine and were the first to manufacture it. Espresso has become such an integral part of Italian life and culture that there are presently over 200,000 espresso bars in Italy.
The perfect esspresso cup
For "The National Institute of the Italian Espresso" and for the association of the espresso experts, the preparation of the perfect esspresso cup is clear and easy: The perfect espresso is covered with dark brown and thick foam layer with fine structure, which is characterized by different shades starting from the ocher-brown palette up to almost orange – yellow part of the palette. In a word, the perfect espresso starts with the perfect crema. Then comes its refreshing aroma of flowers, fruit, toast and chocolate. The taste is mild and complete with a long finish.
That's the theory. But how to create such a miracle of pleasure? To prepare it properly - use proper water, proper machine and of course, good coffee. |
| |

|
Making Espresso Drinks
Can't get your latte at home to taste like one from your favorite café? With a few tips and a little practice, you'll be turning out Italian beverages like a seasoned barista.
So, you've bought a home espresso machine, you have a handy owner's manual that tells you how to operate your toy, but now what? While there's definitely an art to preparing the perfect espresso drink, the process doesn't have to be a foreign concept.
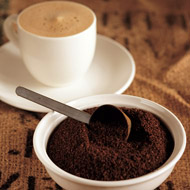
Starting From the Grounds, Up
Coffee beans are ground differently for every form of brewing, including espresso. There are two main types of espresso machines, and they each require a different grind, so first you'll want to determine if yours is steam-driven or pump-driven. (Check with the manufacturer or store where you purchased it.) When you buy beans, specify your machine-type and the barista should know how coarse or fine to grind the beans.
If you want to use a home-grinder, read on:
Grinding at Home vs. at the Store
There's no doubt grinders are fun gadgets for coffee-lovers, but do you need a home grinder? That depends.
A home grinder is perfect for someone who buys more than two week's worth of beans at a time. The coffee's flavor will last longer if the beans are kept whole, then ground right before brewing. The downside is it can be a little messy and adds a bit more time to the coffee-making process. However, if you only buy coffee for a week or two, there's no reason you can't get it ground where you bought it; it's free, convenient, and the coffee will maintain great flavor for up to two weeks.
Convenience issues aside, there is something to be said for indulging in the ritual of preparing each cup of coffee, beginning to end. "Because it's fun" is as good a reason as any to grind fresh beans each morning.
The Daily Grind
If you decide to use a home grinder, there's a small learning curve, but it's completely doable.
An easy way to get started is to purchase a small amount of beans, ground for your machine, to use at home as a reference point. If you don't have a sample, test by grinding a very small amount of beans (one tablespoon is plenty), then put them in the palm of your hand. Squeeze into a fist, and when you release your hand you'll want to see different results depending on your brewing method:
- French Press (coarse grind): the grounds should not stick together.
- Automatic Flat Bottom (medium grind): some of the grounds should stick together, but most should fall away.
- Automatic Cone, Gold Cone, and Steam-driven Espresso Machine (medium-fine): most should stick together, but you should still be able to see individual particles easily.
- Pump-driven Espresso Machine (fine): most grounds should stick together, possibly falling away in clumps, but they shouldn't be so fine they appear to completely melt together.
Got Aerated Milk?
Steaming the milk is the first step in preparing an espresso drink, and the trick to getting creamy, velvety quality is aerating as you steam:
- Fill your milk pitcher no more than half-full (milk will expand when steamed).
- Submerge the steam wand into milk, then turn the steam wand on.
- Begin to aerate by lowering the pitcher a bit while guiding the steam wand so the tip is just kissing the surface of the milk. Find that sweet spot where a layer of foam is beginning to form, creating a sprinkler-like sound, but the wand isn't blowing big bubbles in the milk.
- Once you have a layer of foam, submerge the steam wand again. Continue steaming to between 145-165 degrees F.
- If while steaming, the sound begins to get high pitched, repeat the aeration process, lowering the milk pitcher, until the sound mellows to a soft hum.
When you're done, wipe the steam wand with a wet towel (folded over), then blast the steam wand for a second or two into the towel to blow out any milk that's been caught inside. |
| |

|
Anatomy of an Espresso Shot
Producing quality espresso will be much easier if you become familiar with the three components of a shot. Yes, there will be a little memorization required, but not in the scary biology way.
- The crema is the top thin layer and sweetest part of an espresso shot. A good crema should be a light golden-brown color.
- The body makes up the middle and "umph" of the shot and should be a caramel-brown color.
- The heart is the very bottom of an espresso shot and is the bitter balance to the crema's sweetness. It should be a deep, rich brown color.
For a great example of what shots should look like pouring, empty a can or bottle of Guinness® beer into a pint glass. Notice how it seems to be pouring in rich, creamy layers--dark to light--from the bottom of the pint up. This is exactly how an espresso shot should appear. Just don't expect them to taste the same.
Pulling Shots
What do they mean by "pulling?" This actually refers to the first espresso machines that had levers to pull down in order for shots to pour. Pulling shots doesn't entail quite the workout it once did, but you'll still have to put a little muscle into it. Here's what you need to know to pull shots at home:
- Watering the grounds: for the best results, use filtered water in your espresso machine.
- Portion control: scoop 4T of grounds into your portafilter to pull two one-ounce shots.
- Tamp it like you mean it: "tamping" is just a fancy way of saying "packing the coffee grounds down." Use a medium forced tamp to start, then adjust if needed. If your first shots pour too fast: tamp harder; too slow: tamp lighter.
- Timing is everything: in addition to how a shot looks, the amount of time it takes for shots to pour is also a good indication of quality. Two one-ounce shot glasses should take roughly between 12 to 18 seconds to fill.
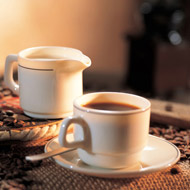
Now that you understand the basic elements in making an espresso drink, it's time for a coffee break. |
| |


|
COFFEE TIPS
Buying Tip
When purchasing coffee, always ask when it was roasted. Many common misconceptions exist when it comes to judging the freshness and optimum time to experience a roasted coffee at its peak of perfection. Generally coffee is best if used a day or two after roasting, and if kept in an air tight container, flavor should not diminish significantly until after seven to ten days. Old coffee beans may appear very oily, will have little or no aroma, or will take on a somewhat unpleasant aroma.
Grinding Tip
Never grind more coffee than you will use for immediate brewing. Once the beans are ground, the flavorful oils are exposed to the damaging air. As these oils dissipate, so will the flavor of your coffee. Once ground, coffee will begin to lose its flavor almost immediately. Different methods of brewing will require different grind consistencies. Typically, coffee used for drip brewing should be ground to a consistency similar to granulated sugar. The complete drip cycle should occur within four to six minutes. If the drip cycle is completed in less than four minutes, grind your coffee finer. If the cycle takes longer than six minutes, grind your coffee coarser. When using a French press, the coffee will need to be ground extremely coarse. Espresso requires an extremely fine grind...almost powder-like with a slight grittiness. The key to the proper espresso grind is the extraction time. After the proper dose and tamp, one ounce of espresso should be extracted in approximately 25 to 30 seconds. Like drip coffee, if the one ounce extraction occurs in less than 25 seconds, grind your coffee finer. If the extraction occurs in longer than 30 seconds, grind your coffee coarser. Talk to you local coffee professional for additional information.
Storage Tip
Never store your coffee in the refrigerator. Coffee will absorb flavors and aromas from other food products in your refrigerator. Freezing coffee can also have a damaging effect, and we do not recommend this practice unless you will not use-up your supply of coffee for a prolonged period of time [two weeks or more]. Coffee should be stored in a clean, dry, airtight container, in a cool, dark place.
Dosage Tip
When making brewed coffee, allow 2 to 2 1/2 level tablespoons for each 6 ounces of water [3 tablespoons for 8 ounces]. For espresso, allow 7 to 8 grams for a single shot, and 14 to 16 grams for a double shot.
French Press Tip
You will want to grind or have your coffee ground to a very coarse consistency for this method. If your grind is too fine, you will over extract your coffee and a bitter flavor may result. It will also be difficult or impossible for you to push the plunger down in your pot if the grind is too fine. Now here is an application for your French press that you probably don't know about. Heat a cup of milk [non-fat works best] in a sauce pan on your stove or in a microwave. It should be heated just until it is too hot to put your finger in it. Don't overheat or you will scald the milk. Next, pour the milk into your clean, empty French press. Insert the plunger, and pump the plunger up and down like a butter churn for several minutes. The milk will expand and increase in volume by three or four times, creating beautiful frothed milk for cappuccinos and lattes.
Moka Pot Tip
It is an old Italian secret to mound the coffee grounds high in the filter basket of the Moka pot before screwing the two pieces together. Do not compact the coffee! To ensure a tight seal, be sure to wipe the rim of the bottom of the pot with your finger to remove any grounds. When the top half of the pot is screwed on, the grounds will be compacted by the filter screen. You should end up with a dry, compacted puck of coffee grounds at the end of brewing.
Filter Drip Tip
Be sure to use a filter, which is designed to fit your filter basket. Bleached white paper filters are most common, however unbleached brown filter papers are usually available. Permanent gold-plated wire mesh filters also work very well and are environmentally friendly.
Coffee + Health Issues
Coffee has been studied for more than a century. For every report that alleges a potential health risk, another may discredit or show benefits. It is generally agreed that pregnant women should limited their coffee consumption. Did you know that drinking a cup of coffee can help calm an acute attack of asthma? Coffee has many positive effects. |
|
|